How to Get Rid of Adobe Genuine Software Integrity Service?
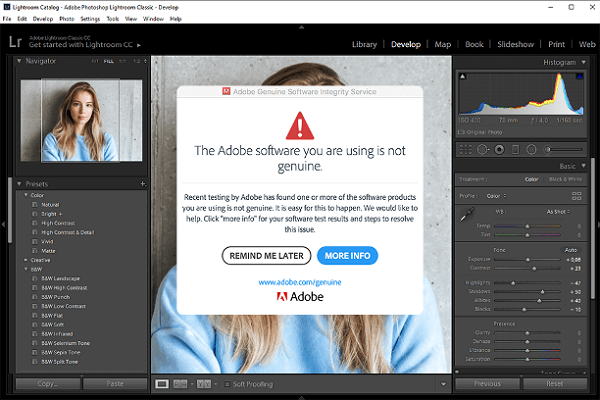
Lately, Adobe has started implementing Adobe genuine software integrity service more aggressively than ever. And hence, many users report about receiving an error message saying ”the Adobe software you’re using is not genuine” which is quite annoying for the software user. But don’t worry, there are ways through which you can disable this pop-up in no time. Let’s figure out those ways.
Part 1: What is Adobe Genuine Software Integrity Service?
The Adobe Suite is a widely used video and photo editor software. However, with the increased usage the demand for improved property protection technologies also increases. As a result of which, Adobe has started tracking down whether an installed product is authentic or not. This helps in keeping track of genuine users, as well as discourage privacy. Adobe uses various technologies and services to track down each user and if it detects that the software has been hacked or your account has been stolen then it will automatically launch a message ”the Adobe software you are using is not genuine”. Not only this, but the users will also see a verification process running in their task manager or activity monitor via Adobe Genuine Software Integrity Service. Besides, you will encounter this issue no matter if you are a Mac user or a Windows user. 
Part 2: Why you get ”The Adobe Software you’re using is not genuine” notification?
Adobe performs a series of validation processes to access the authenticity of the user. If it detects any unusual behavior then it automatically assumes that the account has been modified or stolen and the user doesn’t agree with the licensing terms anymore. However, recently more and more users have started receiving the error message, even after purchasing the legitimate copies of Adobe products. The error usually appears if the product or suite isn’t purchased from the official Adobe website.
Part 3: How to disable Adobe Genuine Software Integrity service windows? 4 ways.
If you are a Windows user and you have tried several ways to remove this pop-up message but you have not been successful yet then these 4 ways will definitely help you out. Try out these methods and start working on your Adobe suites seamlessly.
Way 1: Download Official Adobe Genuine Version
Often time, the error usually appears because people purchase Adobe products from unofficial sources. In such cases, the Adobe website marks the product as non-genuine software. To avoid the inconvenience, make sure you buy the Adobe suites from the official Adobe webpage. You can visit the Adobe website and search for the required software.
Way 2: Adobe Genuine Software Integrity Service disable via Services
This the simplest method for the users of Windows 7,8 and 10. Through this, you can disable the Adobe Genuine Software integrity service without deleting the program.
- 1. Open the search bar and write ”Services” into the search box
- 2. A window containing a list of multiple services will open up. Click on the ”Standard” tab
- 3. Find ”Adobe Genuine Software Integrity Service” from the alphabetical list and right-click on it to open up the context menu. And then select ”Properties”
- 4. Now under the General tab change the startup type to ”Disabled” and tap on thethe “Apply” button.
- 5. Restart the system and launch the program to see if the method worked or not.
Way 3: Disable Adobe Genuine Software Integrity Service Via Task Manager
This is another useful and the most common way among the users.How to Get Rid of Adobe Genuine Software Integrity Service?.to disable Adobe Genuine Software Integrity Service and erase all parts of it causing the pop-up message.
- 1. Open up the search box and type ”Task Manager” to open up a window
- 2. Click on the ”Processes” button and find the ”Adobe Genuine Software Integrity Service”.
- 3. Right-click on it to open the context menu and select ”Open file location” to open up a folder name ”AdobeGCClient
- 4. Leave the folder and return it back to the Task Manager. Now again right-click on Adobe Genuine Software Integrity Service and tap on ”End Task”
- 5. Now go back to the folder and erase the entire AdobeGCIclient to disable the Adobe Genuine integrity Service.
- 6. Restart the system and check if the problem continues or not.
Way 4: Disable Adobe Genuine Software Integrity Service via Command
If none of the above method works out then you can use this one. Though this method is a bit tricky with this, you can manually block adobe genuine software integrity service.
- 1. Type ”cmd” in the search box. Command prompt will pop up. Right-click and choose ”Run as administrator”.
- 2. Command prompt workspace will open up. Input ”sc delete AGSService” and hit enter keyboard.
- 3. Now erase the “AdobeGCClient” folder manually by going on ”C:\Program Files (x86)\Common Files\Adobe\AdobeGCClient”
- 4. Now in the command prompt workspace type, ”sc delete AAMUpdater” and manually erase the folder by going from C:\Program Files (x86)\Common Files\Adobe\OOBE\PDApp\UWA.
Part 4: How to Disable Adobe Genuine Software Integrity Service Mac?
The adobe genuine software integrity service Mac is no different than the windows. However, the process to disable this service is quite different. Here are the steps.
- 1. Open the finder App and click on ”Go” located at the top navigation bar. Select “Go to Folder”
- 2. In the latest version, you can find the library folder so in order to access the folder click on “Go” and Type “~/library”
- 3. Now click “Application support”>“Adobe”>“AdobeGCCClient”
- 4. Finally, delete the entire folder and clear it in the trash. This is how you can disable Adobe genuine software integrity service Mac and continue doing your work without any trouble.
Part 5: Bonus Tip – Beginners Video Editor, Better Than Adobe Premiere Pro
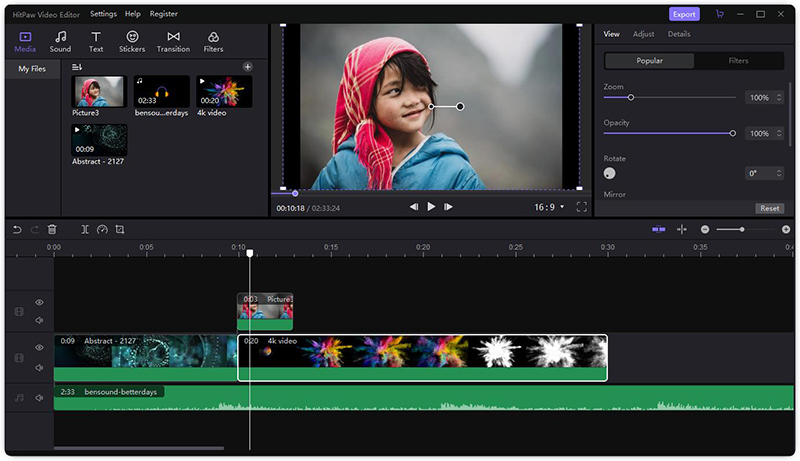
How to Get Rid of Adobe Genuine Software Integrity Service? When we talk about Video editors HitPaw Video Editor is one of the most reliable ones in the market. The features its offers can make the small daily life moments into a personal masterpiece. There are several reasons which make it a better video editor than Adobe Premiere Pro. 
Why HitPaw Video Editor is better than Adobe Premiere Pro
- 1. Adobe requires prior editing experience whereas HitPaw Video Editor is specially designed for beginners and doesn’t have complex menus. Instead, it offers a simple and user-friendly interface.
- 2. Unlike Adobe Premiere Pro, HitPaw Video Editor doesn’t cost an arm and leg. You can get the premiere version in just $29.95.
- 3. HitPaw Video Editor offers plenty of amazing tools and is filled with dozens of filters, stickers, and transitions.
- 4. HitPaw Video Editor allows you add titles, subtitles and watermarks to your video.
- 5. With the help of HitPaw Video Editor you can replace the background noise and add a soundtrack of your choice.
- 6. After you finish editing you can share it on any social media platforms and let the world see your masterpiece.
- 7. Most importantly, unlike Adobe Premiere Pro, HitPaw Video Editor doesn’t interrupt your workflow and offer a smooth trouble-free experience to the users.
Conclusion
We know that the pop-up you have received while using your Adobe suite is extremely annoying. It doesn’t let you do your work and bothers you every time you open up the software. Therefore, the above-mentioned tricks are just the right thing for you. You can now fix adobe genuine software integrity service in just a few minutes. Do try them out and don’t forget to share them with your friends and family. However, if the problem still persists then we recommend you switch to HitPaw Video Editor as soon as possible. This editor will make your workflow smooth and effortless. In case you want to edit videos with HitPaw Video Editor, here is a user guide for you. TFSBS
